
Desktop wallet
Start by selecting or creating a profile. Each profile keeps its own wallet list, contacts, network preference, and appearance.
Create a profile
Section titled “Create a profile”Choose Create profile at the welcome screen or profile chooser.
- Profile: enter a name.
- Appearance: choose an avatar and background.
- Network: select Mainnet or Testnet.
- Review: check your choices, then select Create profile.
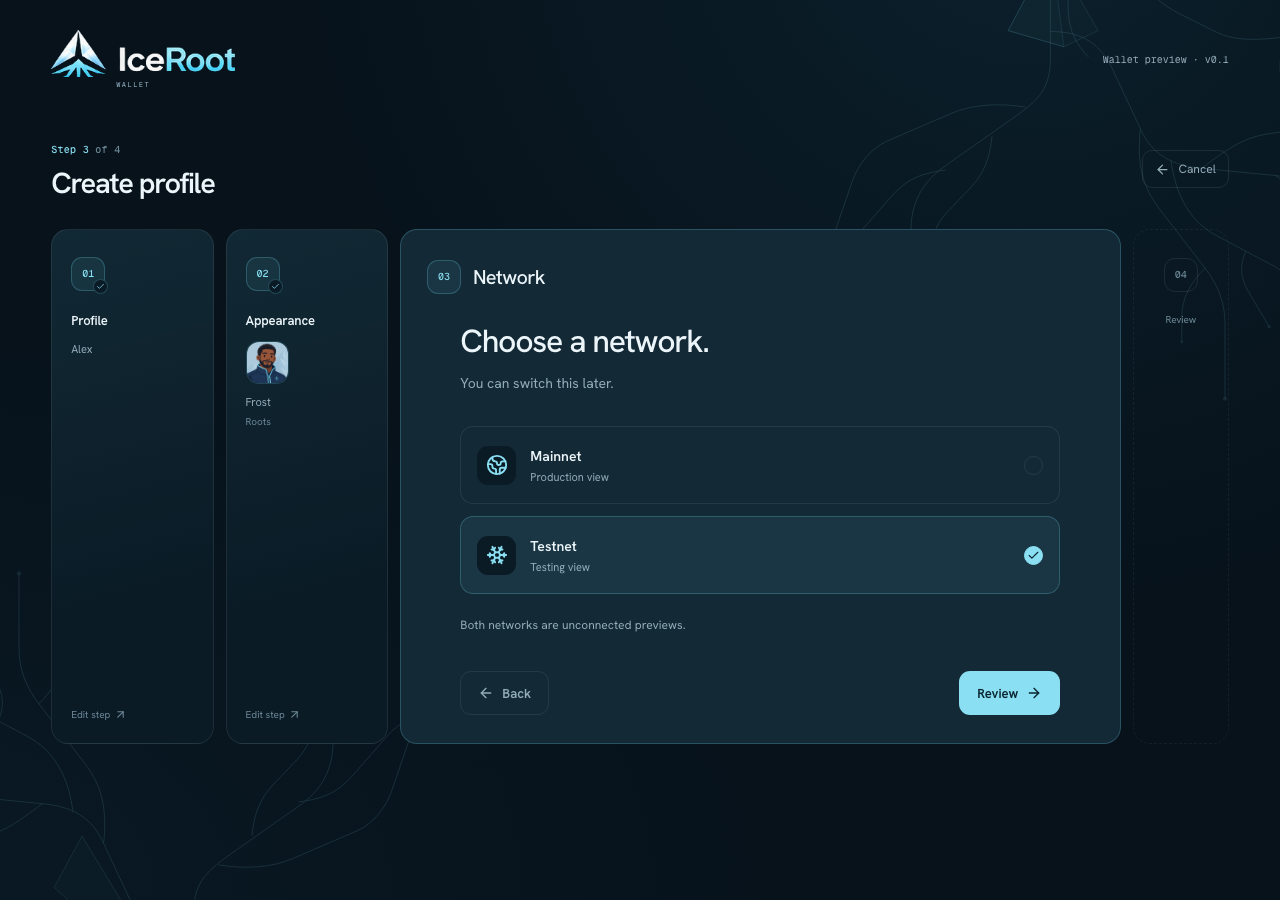
Completed steps stay visible on the left. You can return to one before creating the profile.
A profile is saved on this device. Creating one does not generate keys or a recovery phrase. The current Mainnet and Testnet choices are unconnected views.
Explore the wallet
Section titled “Explore the wallet”For a populated walkthrough, choose Explore demo at the profile chooser. It opens sample wallets, assets, activity, and validator votes without changing your saved profiles.
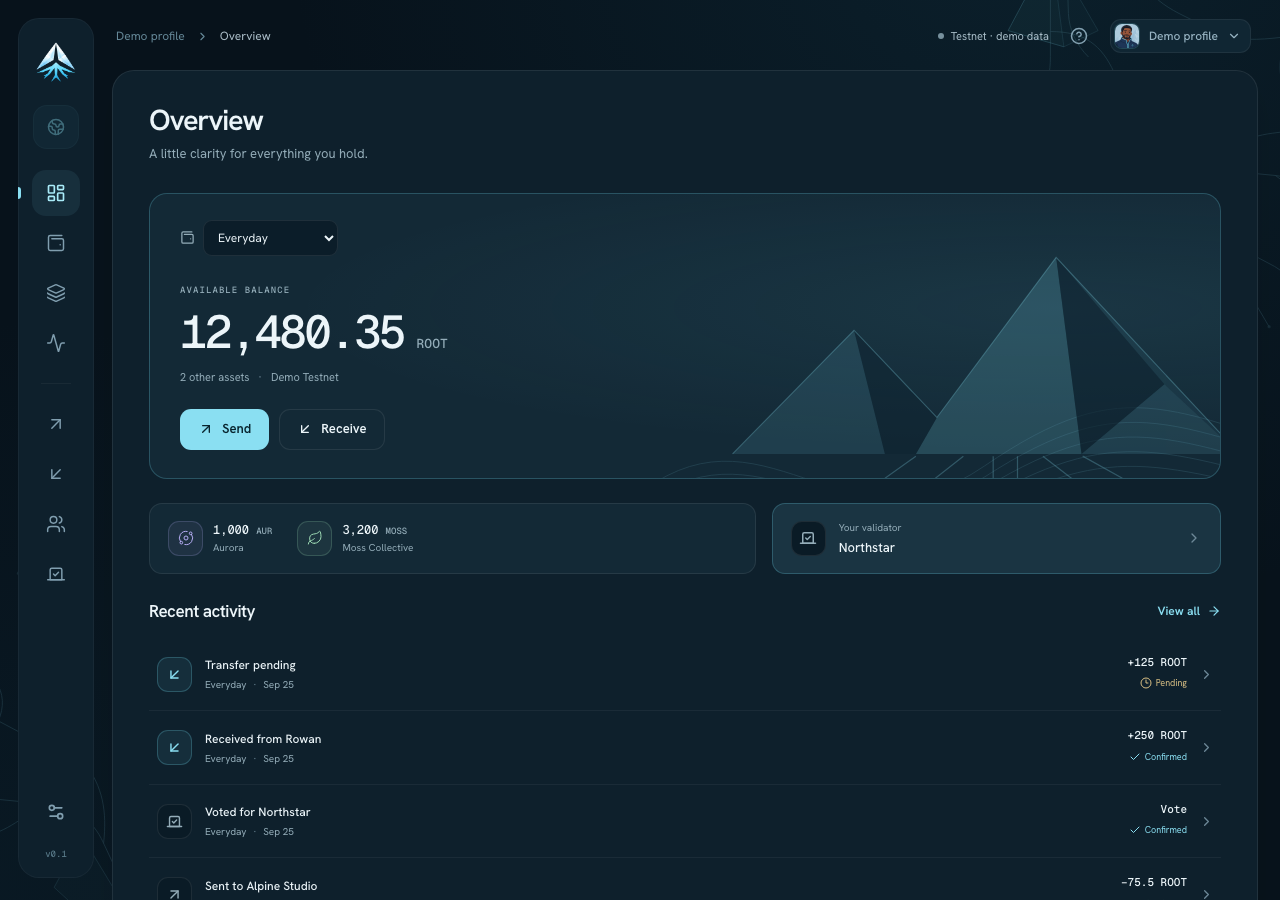
The overview brings the selected wallet’s balance, assets, activity, and vote into one view.
Use the sidebar to open:
- Overview for a summary of the selected wallet.
- Wallets to select and organize wallet references.
- Assets and Activity for holdings and recorded changes.
- Send, Receive, and Governance for the related action.
- Settings for appearance and local preferences.
Appearance and profiles
Section titled “Appearance and profiles”Dark mode is the default. Change the theme in Settings, or customize the profile’s avatar, background, and optional background motion. System reduced-motion preferences take priority.
Open the profile menu at the top right and choose Switch profile to return to the chooser.
Follow an action
Section titled “Follow an action”Transfers use Details → Review → Result. Return to an earlier step to correct a value before continuing. Demo actions change sample balances only; they do not move real funds.